


A guitar pedalboard is more than just a practical tool for organising effects; it’s the heart of your sound and a crucial part of your creative process. Whether you’re a beginner setting up your first pedalboard or a seasoned guitarist refining your rig, understanding how to build, set up, and optimise your pedalboard is essential for getting the best performance from your pedals.
In this guide, we’ll cover everything you need to know about guitar pedalboards—from their purpose and components to wiring, setup, and optimisation for optimal sound quality.
What Is a Guitar Pedalboard?
A guitar pedalboard is a flat surface designed to hold and organize your effects pedals. It serves as the foundation for your guitar rig, providing a convenient way to arrange, secure, and power your pedals. Pedalboards come in various sizes and configurations, ranging from small boards for simple setups to larger ones that accommodate a full range of effects for professional musicians.
Not only does a pedalboard help keep your gear organized, but it also improves accessibility, reduces clutter, and ensures your pedals are securely attached during performances. Moreover, a well-organised pedalboard allows for easy connections and optimal signal flow, which is crucial for achieving the best sound.
How to Build a Guitar Pedalboard?
Choose the Right Pedalboard
The first step in building a guitar pedalboard is selecting the right one. There are many different pedalboards on the market, ranging from compact and portable boards to large, customizable options.
When choosing your pedalboard, consider the following factors:
- Size: Choose a board that can accommodate your current pedals with some room for future additions. If you have a small setup with just a few pedals, a compact board will work, but if you plan to add more effects in the future, a larger board with extra space is better.
- Portability: If you’re a touring musician or need to transport your pedalboard frequently, look for a lightweight board with a protective case or a flight case for safe travel.
- Durability: Look for pedalboards made of strong materials like aluminum or steel to withstand the wear and tear of regular use. Many pedalboards come with sturdy frames and durable surfaces for long-lasting performance.
Some of the most popular pedalboard brands include Pedaltrain, Gator, and Temple Audio, which offer various configurations to suit different setups.
Organize Your Pedals
The next step is to arrange your pedals in a way that ensures optimal signal flow. The order in which pedals are connected is crucial to achieving the best sound.
Here’s a common signal chain for electric guitars:
- Tuner (first in the chain): This pedal ensures your guitar is in tune before any effects are applied.
- Wah/Envelope Filter: Modulation effects like wah and envelope filters typically go early in the chain to shape your tone.
- Overdrive/Distortion: These gain-based pedals work best when placed early in the chain so they can interact with the clean signal from your guitar.
- Chorus/Flanger: These modulation effects usually go after overdrive pedals to add depth and movement to your sound.
- Delay/Reverb: Time-based effects like delay and reverb should be placed at the end of the chain to preserve their clarity and prevent them from being distorted by other effects.
The order of your pedals affects your sound, so take time to experiment with different setups to find the one that best suits your style.
Secure the Pedals
Once your pedals are arranged, you’ll need to secure them to the pedalboard to prevent movement during use.
There are several ways to do this:
- Velcro Strips: Velcro is a quick and easy solution for securing pedals. It allows for easy adjustments and reorganisation, though it may wear out over time.
- Zip Ties: Zip ties provide a more permanent solution and are ideal for heavy-duty setups, but they require modification to the pedal’s casing.
- 3M Dual Lock: This adhesive option offers a strong, long-lasting bond and is more durable than standard Velcro.
- Mounting Brackets: Some pedalboards come with built-in mounting brackets, providing a professional and sturdy way to attach pedals.
Powering Your Pedals
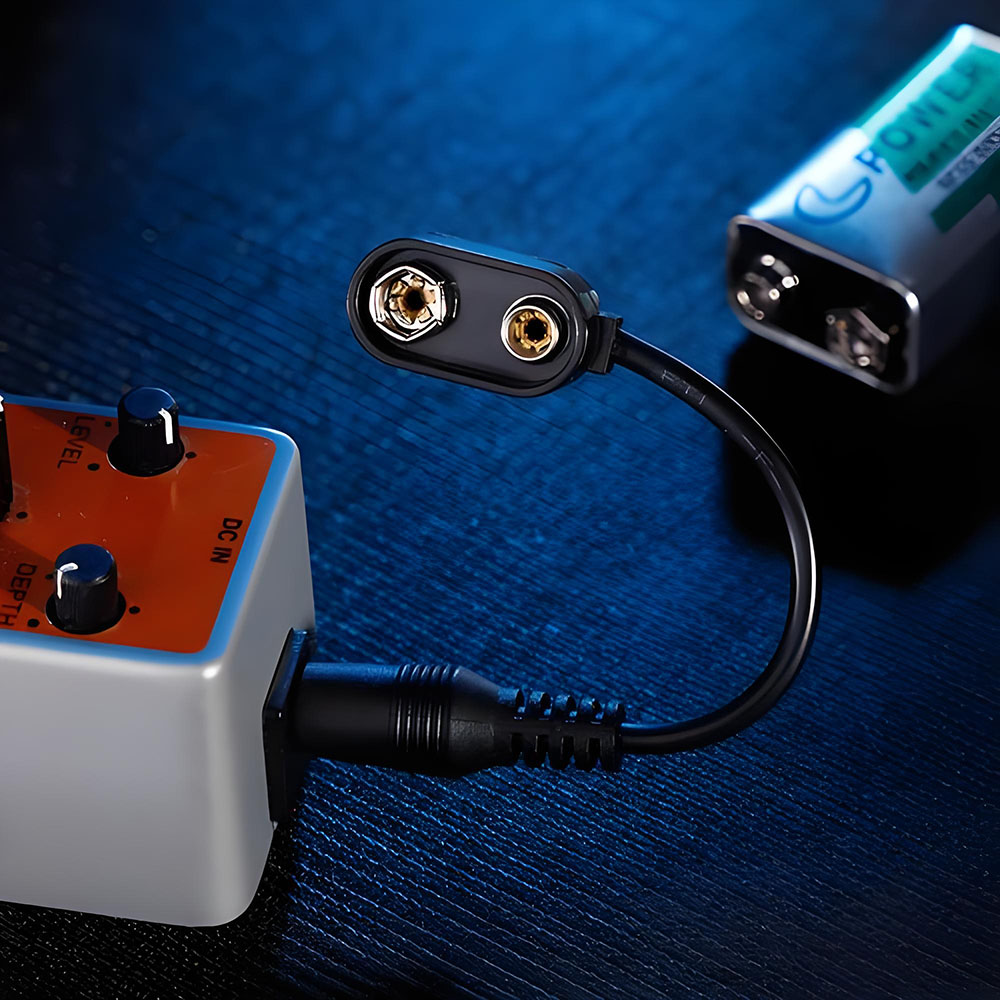
A reliable power supply is critical for ensuring that your pedals function properly. Pedals require different amounts of power, and using the wrong power supply can result in noise, hum, or unreliable performance.
Here are some tips for powering your pedalboard:
- Daisy Chains: A daisy chain is a cost-effective way to power multiple pedals from a single power source. However, it can introduce noise if the pedals aren’t isolated, so it’s best to use isolated power supplies if possible.
- Isolated Power Supplies: Isolated power supplies provide each pedal with a dedicated power source, reducing the risk of interference or hum from other pedals.
- Voltage and Polarity: Make sure the voltage and polarity match the requirements of each pedal to avoid damage and ensure proper operation.
How to Set Up Your Guitar Pedalboard?
Setting up your pedalboard involves connecting each pedal in the correct order and ensuring proper signal routing.
Here’s a step-by-step guide for setting up your pedalboard:
Connect Your Guitar: Plug your guitar into the input of the first pedal in your chain, which is usually the tuner. From there, each pedal will pass the signal to the next in line.
Link the Pedals: Use high-quality patch cables to connect the pedals. Make sure the pedals are securely attached to the board and that the cables are free from interference.
Final Output to Amp: After all pedals are connected, run a cable from the last pedal in the chain to the input of your amplifier. This ensures that the effects are applied before the signal reaches the amp.
Test the Setup: Once everything is connected, power on your pedals and check each one to ensure it’s working correctly. Adjust the order of your pedals as needed and experiment with different settings to find your ideal tone.
Wiring Your Guitar Pedalboard
Proper wiring is crucial for maintaining signal clarity and minimising noise.
Here are some important wiring tips:
- Use Short Patch Cables: Shorter cables reduce signal loss and help keep your setup tidy. Try to keep the patch cables as short as possible without sacrificing flexibility.
- Avoid Ground Loops: Ground loops can cause hum and noise in your signal. Make sure all your pedals share a common ground to eliminate this issue.
- Cable Management: Use cable ties or cable sleeves to keep your cables organised and prevent them from tangling or becoming damaged.
Attaching Pedals to the Board
To keep your pedals secure during use, you’ll need to attach them to the pedalboard.
You can use various methods, such as:
- Velcro Strips: Quick and easy to use, but they may wear out with time and require periodic replacement.
- Zip Ties: Provide a strong and permanent hold, but they require modification to your pedals.
- 3M Dual Lock: Offers a stronger, more durable bond compared to standard Velcro.
- Mounting Brackets: These provide a clean, professional look and are great for custom setups.
Using Multiple Pedals on a Pedalboard
Yes, you can use multiple pedals on a single pedalboard. Combining different effects allows you to create a vast array of sounds and textures. However, it’s essential to ensure that your power supply can handle the combined wattage of all your pedals. You may also need to experiment with the order of pedals to achieve the best possible sound.
Can You Plug Guitar Pedals Into a Mixer?
While guitar pedals are designed for instrument-level signals, they can be used with a mixer if you have the proper setup. Use a DI box (direct input box) to convert the instrument-level signal to a mic-level signal, making it suitable for mixing. Alternatively, some mixers have insert points or aux sends that allow you to route your pedals into the mix, applying effects to specific channels as needed.
Choosing the Best Guitar Effects Pedalboard
The best pedalboard for you will depend on your needs, preferences, and budget.
Here are some of the top pedalboard brands and their features:
- Pedaltrain Classic Series: Known for their durable aluminum frames, versatility, and ease of setup.
- Gator G-Tour Pedalboards: Designed for touring musicians, offering protection and ample space for pedals.
- Temple Audio Design: Features modular designs with customizable layouts and built-in power supply integration.
Conclusion
Building and setting up a guitar pedalboard is an exciting process that enhances your musical creativity. By carefully selecting your pedals, arranging them in the correct order, and ensuring proper wiring and power supply, you can create a pedalboard that suits your playing style and musical goals. Whether you’re a beginner or a professional, a well-organised pedalboard will help you achieve the sound you’ve always wanted.
By understanding the essentials of pedalboard setup and optimization, you’ll be able to experiment with new sounds, refine your tone, and take your guitar playing to the next level.


